Shop Bunny Rabbit Tea Sets: The Ultimate guide for whimsical tea parties.
- Blog
- Shop Bunny Rabbit Tea Sets: The Ultimate guide for whimsical tea parties.
green tea
Okay, so I’ve been wanting to make a “bunny rabbit tea set” for a while now, and today I finally did it! I gotta say, it was a bit of a journey, but totally worth it in the end.
First, I gathered all my materials. This involved a trip to the craft store, which, let’s be honest, is always a dangerous place for my wallet. I picked up some plain white ceramic teacups and saucers, a teapot, some acrylic paints in pastel colors (pink, blue, yellow, and a bit of white), and some fine-tipped paintbrushes. Oh, and some sealant, gotta protect the artwork, you know?
Back home, I laid out some newspaper on my kitchen table – acrylic paint can get everywhere. Then I started sketching out some basic bunny shapes on paper. I’m no Picasso, so I kept it simple: round bodies, long ears, little cotton tails. Once I had a design I liked, I very lightly penciled it onto the teacups and saucers.
Then came the painting! I carefully filled in the bunny shapes with the pastel paints. The pink and blue bunnies were my favorites. I added little white dots for eyes and tiny pink triangles for noses. It took a couple of coats to get the colors nice and solid, so I had to be patient and let each layer dry completely. That was the hardest part, honestly.
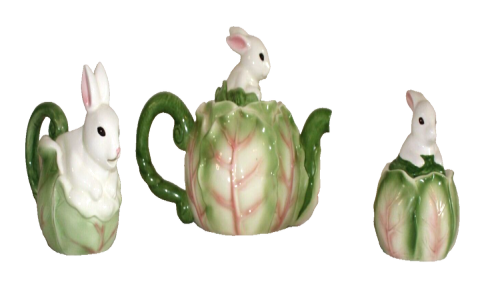
The teapot was the centerpiece, so I wanted to make it extra special. I decided to paint a whole family of bunnies on it, all gathered around a little picnic basket. I even added some tiny painted flowers and carrots. It took the longest, but it was so much fun to see it come together.
After everything was completely dry (like, really dry – I waited a full 24 hours!), I carefully applied a thin layer of sealant over the painted areas. This will help protect the designs from chipping and fading, and it also gives the tea set a nice, glossy finish.
And that’s it! My bunny rabbit tea set is complete! It’s not perfect, but I made it, and that’s what matters. It’s super cute, and I can’t wait to use it for a special tea party… or maybe just for my morning coffee. It definitely makes me smile!
© Copyright 2025 Qianwei Tea | Theme developed by sitemap